It is important for home owner to be aware of plumbing factors at their home so that they can check differnet things and resolve issue before it become big. We have mentioned 12 tips that will be helpful for the people in the Untied States in the summer season.
1- Test the Sump Pump Before the First Summer Storm:
Summer thunderstorms can dump 2-4 inches of rain in an hour. If your sump pump has been sitting idle then it became more worse. You can check either your sump pump is working or not, and what is the exact issue, check our blog.
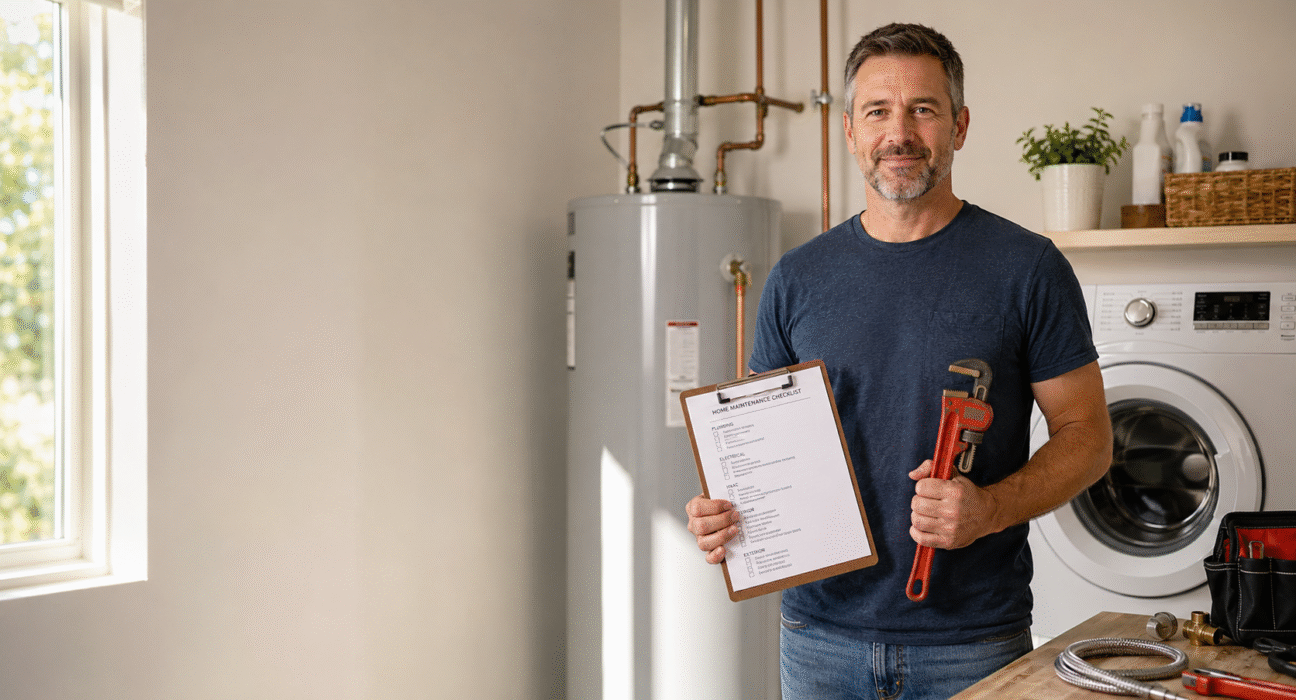
2: Flush the Water Heater:
Sediment builds up at the bottom of a water heater every year calcium, magnesium, sand, rust. By summer 2-3 of a tank’s life, that layer insulates the burner or element from the water, making the tank work harder, cost more to run, and fail sooner. The U.S. Department of Energy notes water heating is the second-largest energy expense in most homes around 18% of the bill so a sediment-choked tank hits your utility costs directly.
- To flush a standard tank water heater:
- Turn off the gas (or electric breaker) and the cold water supply.
- Connect a garden hose to the drain valve at the bottom.
- Run the hose to a floor drain or outside (water will be hot — don’t run it across grass you care about).
- Open the drain valve and a hot-water faucet upstairs (to break the vacuum).
- Drain until water runs clear — usually 15-30 minutes.
- Close everything in reverse order, refill the tank, then restore power/gas.
The anode rod inside your water heater is a sacrificial metal rod that corrodes instead of your tank’s steel walls. When it’s gone, your tank starts corroding. Most homeowners have never seen theirs.
Unscrew the hex head on top of the tank (or behind a removable cover panel) and pull the rod out. If it’s heavily eaten down wire core visible, less than ½ inch of magnesium left — replace it. A $25 rod can add 5+ years to a water heater’s life.
4- Inspect Every Outdoor Faucet for Hidden Damage:
Walk every hose bib on your house. For each:
-
- Turn it on with no hose attached. Look for drips at the handle, top, or spout.
- Walk inside and check the supply line behind the wall for moisture, dark stains, or rust.
- Confirm the vacuum breaker isn’t leaking when the water’s on.
- Make sure the handle turns smoothly.
A frost-damaged supply pipe inside the wall often shows up only when summer pressure runs through it. We have written in blogs how the home owner can repair a leaky outdoor faucet in 6 steps.
5- Service the AC Condensate Drain Line:
This is technically HVAC, but it leaks into plumbing’s lane fast a clogged AC drain line floods ceilings and rots floors. Two things to do:
-
- Pour a cup of white vinegar into the drain access tee near your air handler. Repeat every 1-3 months through cooling season.
-
- Drop a biocide tablet into the condensate pan at the start of cooling season.
This is technically HVAC, but it leaks into plumbing’s lane fast and a clogged AC condensate drain line floods ceilings and rots floors.
6- Replace Washing Machine Supply Hoses
Rubber washing machine supply hoses fail by bulging, cracking, or bursting — usually when no one’s home. A burst hose at 60 psi can dump 600 gallons an hour into your laundry room.
Standard rubber hoses are rated for 5 years; braided stainless steel hoses are rated for 10. Look at the date stamped on yours. If you can’t find one or remember when they were installed, replace them now. A pair of braided stainless hoses costs $15-25.
While you’re behind the washer, check that the supply valves turn fully off. Older valves seize. Replacing a stuck valve with a single-lever shutoff is the right move.
7- Walk the Irrigation System
Before relying on your irrigation system all summer:
-
- Run each zone individually. Watch every head spray.
-
- Replace broken sprinkler heads (~$5 each).
-
- Adjust direction so heads aren’t soaking driveways or siding.
-
- Check the backflow preventer (typically above ground, painted black) for drips.
-
- Confirm the controller’s schedule makes sense for current weather.
-
- Test that each zone valve closes fully after the cycle — a stuck-open valve is a slow-bleed disaster.
8- Inspect Toilet Flappers in Every Bathroom
Drop food coloring in every toilet tank (without flushing) and wait 15 minutes. Color in the bowl = leaking flapper. A $7 flapper installed in 10 minutes can save a homeowner 200+ gallons per day per toilet.
While you’re at the toilet, check the supply line (the small braided line from wall to tank) for kinks, corrosion, or moisture. Old plastic supply lines crack. Upgrade to braided stainless ($8-12) if you haven’t already. The EPA’s WaterSense program recommends this same test and notes a single leaking toilet can waste up to 200 gallons a day.
9- Clear Slow Drains Now Not When They Back Up
Hot weather makes drain smells worse and slow drains slower. Now is the time to clear them.
-
- For kitchen drains: pour ½ cup baking soda, then ½ cup white vinegar. Wait 15 minutes. Flush with a kettle of boiling water.
-
- For bathroom drains: pull and clean the stopper, then use a hair-catcher tool to remove the gunk that’s built up just below.
-
- For tubs and showers: a $3 drain snake (the plastic kind with barbs) pulls out astonishing hairballs.
Avoid chemical drain cleaners on older homes with metal drain pipes — they corrode the pipes. Enzyme-based products are gentler and work over time.
10- Check P-Traps That Don’t Get Used
Every drain has a P-trap — that U-bend that holds a small amount of water as a barrier against sewer gas. Drains you rarely use (guest bathroom, basement floor drain, utility sink) can have their P-traps dry out through evaporation, letting sewer gas into your home.
11- Insulate Sweating Pipes Before They Damage Your Basement
In humid climates, cold water lines and toilet tanks sweat through summer. The condensation drips, soaks into joists, and over years causes wood rot or mold growth. The fix is cheap and one-time:
-
- Foam pipe insulation sleeves slip over exposed cold-water lines in basements and crawlspaces. About $1-2 per 6-foot section.
-
- Toilet tank liner kits prevent tank sweating ($15-25).
-
- A basement dehumidifier helps if humidity sits above 60%.
12- Locate (and Test) Your Main Water Shutoff
When something goes wrong — a pipe bursts, a hose blows, a toilet supply line splits — you’ll have about 60 seconds to limit the damage before water starts soaking into the floor. You need to know exactly where your main shutoff valve is and confirm it actually works.
Find it now (usually in the basement near where the supply line enters the house, in a utility closet, or in a meter box outside). Turn it fully off. Try a faucet — water should stop within seconds. Then turn it back on and check no fixture is now leaking.
Old gate valves often seize after years of being open. If yours won’t budge or is corroded, replace it now with a quarter-turn ball valve. This is the single most important plumbing upgrade in any older home
Frequently Asked Questions
How often should I flush my water heater?
Once a year for tank water heaters in average-hardness water. Twice a year if you have hard water or notice popping/rumbling sounds when the tank heats up. Tankless heaters need descaling every 1-2 years.
What summer plumbing tasks are most often skipped?
The biggest blind spots are: washing machine supply hoses, anode rod replacement in water heaters, P-traps in unused drains, and locating/testing the main water shutoff. None require a plumber — but skipping them sets up the emergencies that do.
Do I need to drain my water heater every year?
Yes for tank heaters. Sediment buildup reduces efficiency, shortens tank life, and can cause popping sounds and uneven temperature. A full flush takes 30 minutes once you’ve done it once.
When should I schedule professional plumbing maintenance?
Annually for whole-house inspection is ideal in older homes (25+ years). At minimum, schedule a sewer line camera inspection every 3-5 years if you have mature trees near the line, plus water heater service in year 5+ of the tank’s life.
Can I do summer plumbing maintenance myself?
Yes 90% of the items on this list are DIY-friendly with basic tools. The exceptions are PRV replacement, anode rod replacement on tight-clearance tanks, and any work behind finished walls. Know your limit and call a plumber when you hit it.
What’s the most important summer plumbing task?
Two tied at the top: confirming your main water shutoff actually works, and replacing aging washing machine hoses. Each represents a five-figure repair if neglected. Both take less than 20 minutes.
Should I winterize outdoor faucets in summer?
No outdoor faucets are designed for summer use. Winterize them only in fall, before the first freeze. In summer, just make sure they’re working without leaks and that hoses are stored properly.