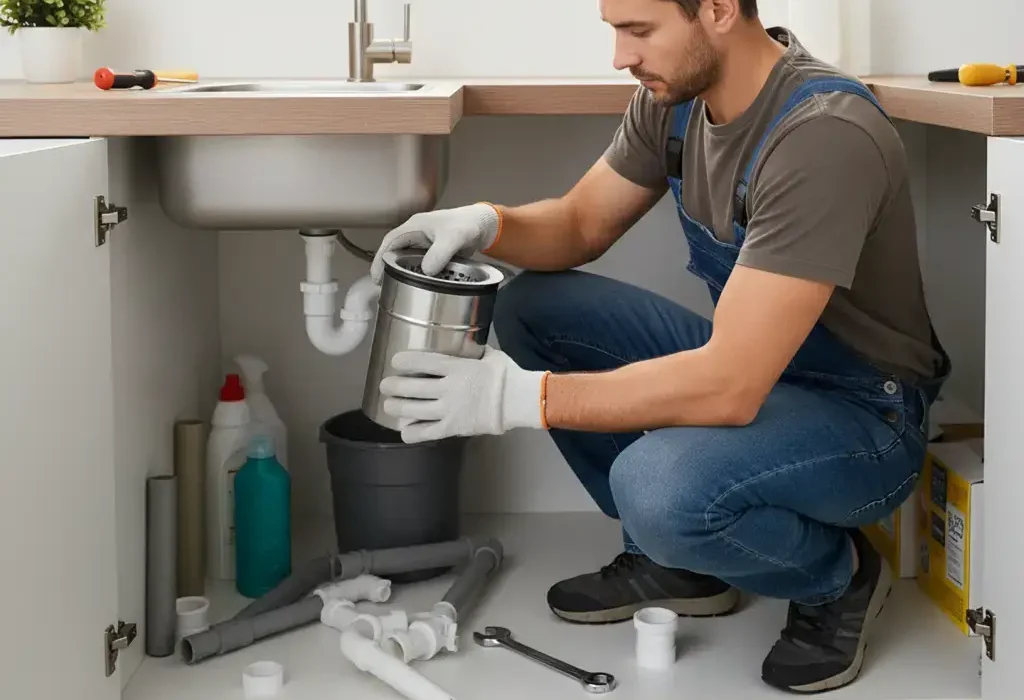
Replacing drain pipes under kitchen sink with garbage disposal may seem like a difficult job, but with the right tools, a bit of patience, and some guidance, it can be done as a DIY plumbing project. Whether you’re upgrading an old system or fixing a leak, understanding how replacing drain pipes under kitchen sink with garbage disposal works will make the job much smoother.
In this guide, you’ll learn every essential step from removing old pipes to reconnecting your garbage disposal drain while keeping your kitchen safe and leak-free. Visit our site to learn more about plumbing tips and DIYs for homeowners.
Understanding the Drain Setup Under Your Sink
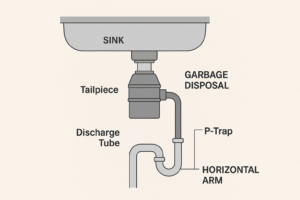
Before you start, it’s important to visualize the system. Have a look under your kitchen sink; there you’ll typically find a P-trap, tailpiece, and discharge pipe connected to the garbage disposal. The garbage disposal unit is there to grind the food waste and push it into the drain line, where water from your sink carries it away.
If you’re replacing drain pipes under kitchen sink with garbage disposal, you’ll likely need to disconnect the P-trap and replace parts such as:
-
- The tailpiece from the sink or disposal
-
- The discharge tube from the disposal to the trap
-
- The horizontal arm connecting to the wall drain
Understanding the layout will prevent leaks and alignment issues once replacing drain pipes under kitchen sink with garbage disposal is underway.
 Tools and Materials You’ll Need
Before replacing drain pipes under kitchen sink with garbage disposal, gather these tools:
-
- Adjustable wrench and pliers
-
- Bucket and towels (for catching water)
-
- PVC pipes and fittings (1½ inch standard)
-
- Plumber’s putty and Teflon tape
-
- Hacksaw (if trimming pipes is necessary)
-
- Flashlight or headlamp
Having these ready helps ensure a smooth and efficient installation process.
Step-by-Step Guide to Replacing Drain Pipes Under Kitchen Sink with Garbage Disposal
Step 1: Turn Off Power and Water
Safety is always first. Unplug all your disposals or turn off their breakers to avoid any accidents. Shut off the water supply valves under the sink.
Step 2: Remove the Old Drain Assembly
Then place a bucket under the pipes, then loosen the slip nuts with pliers. Remove the old P-trap and tailpiece, allowing any leftover water to drain.
Step 3: Inspect and Clean Connections
Before installing new pipes, you need to check for corrosion or buildup in the wall drain, and if you find any, clean it out. Proper drain alignment under the sink ensures leak-free connections.
Step 4: Connect the Garbage Disposal Unit
If not already installed, follow standard garbage disposal installation steps:
- Mount the disposal to the sink flange.
- Connect the power cord and test for secure placement.
- Attach the dishwasher drain hose if applicable.
Step 5: Install the New Pipes
Now connect the P-trap to the disposal unit using a discharge tube. Ensure each slip joint is tight but not overtightened; overtightening it can crack PVC fittings. Proper alignment is crucial while replacing drain pipes under kitchen sink with garbage disposal to avoid leaks and drainage issues.
- The short pipe from the disposal outlet connects to the trap inlet.
- The trap arm should slope slightly downward toward the wall drain for proper flow.
Step 6: Secure and Test the System
- After connecting everything, run water through the sink and check for leaks. If you spot drips, tighten the joints or reapply plumber’s tape where needed.
- Proper waste line connection to disposal ensures smooth drainage and prevents backups.
DIY Plumbing Safety Tips
When doing plumbing work yourself, a few precautions can save you time and trouble:
- Always cut the power to your disposal before handling it.
- Use gloves when working around sharp pipe edges or in tight spaces.
- Never overtighten fittings; it can cause small cracks that lead to leaks later.
- If your old plumbing is made of metal, ensure it is compatible with new PVC components.
Safety matters as much as the install itself, especially when replacing drain pipes under kitchen sink with garbage disposal in older homes. By following these DIY plumbing safety tips, you’ll avoid the most common mistakes that lead to costly repairs.
Maintenance Tips for Long-Term Performance
Once your setup is complete, maintaining your kitchen drain pipe system helps prevent clogs and buildup. Run cold water when using your garbage disposal, and avoid putting grease or fibrous foods down the drain. Performing regular kitchen drain pipe maintenance ensures your plumbing lasts for years without needing replacement.
Preventive care reduces the likelihood of having to replace drain pipes under kitchen sink with garbage disposal again later. Checkout our blog on why you should do regular drain inspection to get a better understanding of preventing drain problems.
FAQs
1. Can I handle replacing drain pipes under kitchen sink with garbage disposal myself?
Most homeowners can handle replacing drain pipes under kitchen sink with garbage disposal using basic tools and careful attention to the instructions.
2. Do I need special pipes for a sink with a garbage disposal?
Standard PVC or ABS pipes work fine, but you’ll need compatible fittings for the disposal’s discharge outlet.
3. How do I connect the garbage disposal to the existing drain line?
You can use a discharge tube from the disposal to the P-trap, ensuring proper slope and tight slip-joint fittin