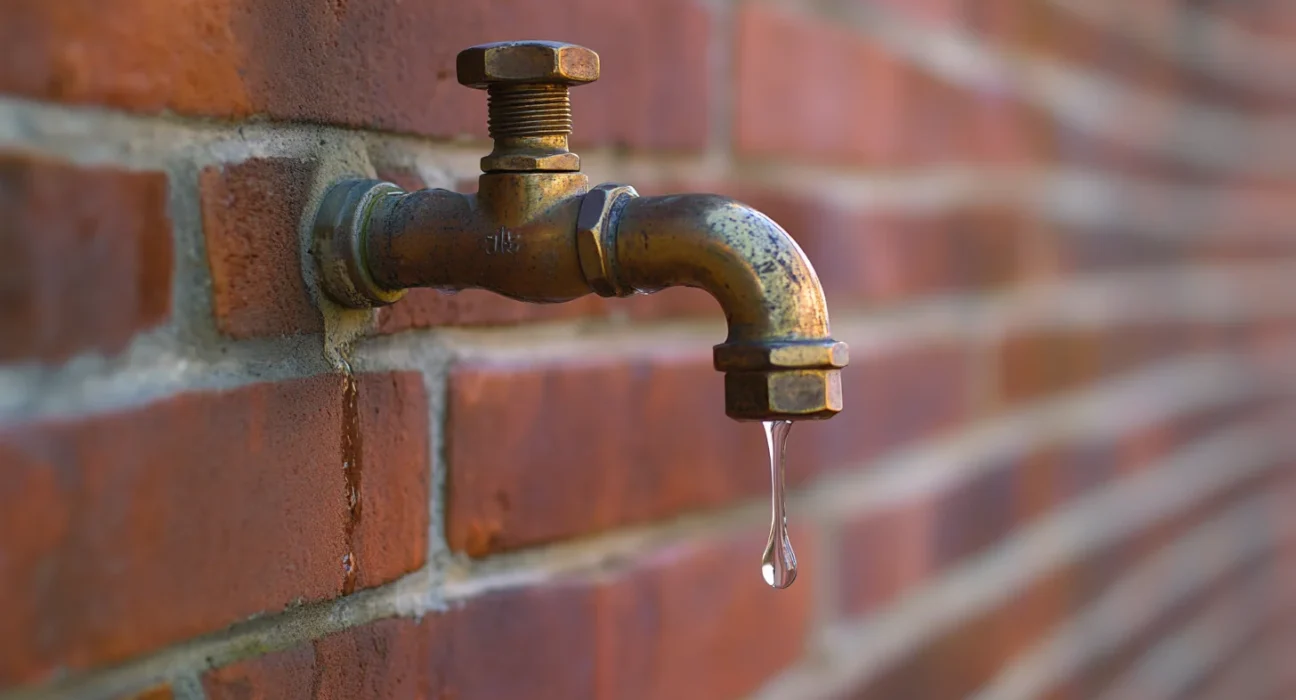
An outdoor faucet leaking isn’t just annoying — it can waste hundreds of gallons of water a month, rot the siding behind it, and in winter, turn into a frozen pipe disaster waiting to happen. The frustrating part is that “leaking outdoor faucet” can mean five totally different things, each with a different fix.
This guide breaks down the seven most common causes of a leaking hose bib, how to diagnose which one you have in under two minutes, and exactly how to fix it. Most of these repairs take under an hour and cost less than $15 in parts.
Where Is the Leak Coming From?
Before you buy parts, figure out where the water is escaping. Stand at the faucet with it fully closed and the hose disconnected. Then turn it on. Then turn it off. Pay attention to:
- Drips from the spout when the handle is closed → bad washer or valve seat (Cause #1)
- Water seeping around the handle/stem when the faucet is on → worn packing nut or stem O-ring
- Water leaking from the top of the faucet (vacuum breaker) → failed anti-siphon valve (Cause #3)
- Water dripping from the wall connection behind the faucet → cracked pipe or fitting (Cause #4)
- Continuous drip even after replacing the washer → pitted valve seat (Cause #5)
- Leak that only appears in spring after winter → frozen split pipe inside frost-free sillcock (Cause #6)
- Leak from threads where the hose attaches → damaged hose threads or missing washer (Cause #7)
Cause #1: Worn Rubber Washer (the Most Common Cause)
If your outdoor faucet drips steadily from the spout when fully closed, it’s almost always a worn washer. The washer is a small rubber disc inside the valve that seals against the seat when you tighten the handle. Over years of compression, it hardens, cracks, or develops a groove that water seeps through. If you’re not sure where your home’s shutoff valves are, our blog about basic plumbing knowledge can help you locate them before you start.
How to fix:
- Turn off water to the faucet at the shutoff valve inside your house (usually in the basement or crawlspace, on the supply line that feeds the exterior wall).
- Open the outdoor faucet to relieve pressure and drain residual water.
- Use a wrench to loosen the packing nut (the hex nut right behind the handle).
- Unscrew the handle assembly — the stem will pull out with it.
- At the very end of the stem, you’ll see a brass screw holding a rubber washer. Remove the screw, replace the washer (universal sizes at any hardware store, usually a 10-pack for under $3).
- Reassemble in reverse order. Turn the water back on and test.
Total time: 15-20 minutes. Cost: under $3.
Cause #2: Bad Packing or Stem O-Ring
If water seeps around the handle every time you turn on the faucet, the issue isn’t the washer — it’s the packing or O-ring that seals the stem inside the body. Water under pressure escapes upward past the seal instead of going out the spout.
How to fix:
The disassembly is identical to Cause #1 — pull the stem out. But instead of replacing the washer at the end, look at the O-ring on the stem itself (usually one or two rings around the shaft). If they’re flattened, cracked, or missing, replace them with matching sizes.
For older faucets that use string packing instead of O-rings, you can wrap new graphite packing string around the stem under the packing nut. Either fix runs under $5.
Cause #3: Failed Vacuum Breaker (Anti-Siphon Valve)
Modern outdoor faucets are required by plumbing code to have a vacuum breaker (also called an anti-siphon valve) — that little cap on top of the spigot. It prevents contaminated water (like garden chemicals from a connected hose) from being siphoned back into your drinking water supply if pressure drops.
When the rubber check disc inside the vacuum breaker fails, water spurts or drips out of the top of the faucet every time you turn it on.
How to fix:
Most vacuum breakers are designed to be replaced as a unit. Look for a small screw or set bolt on top — unscrew it and the entire cap lifts off. Bring it to a hardware store and match the brand/size, then install the new one. No need to shut off the water for this fix; it’s external to the valve body. Cost: $5-12.
Some older faucets have a rebuildable vacuum breaker. If yours has a removable check disc and spring inside, you can replace just those parts for a couple dollars.
Cause #4: Cracked Pipe or Fitting Behind the Wall
If the water is pooling near your foundation rather than showing up inside the wall, the leak may be in a supply line running beneath your slab and reaching it can call for plumbing tunnel repair, which fixes the pipe without breaking through your floors.
If water is appearing behind the faucet soaking the siding, dripping inside the wall, or pooling at the foundation the leak isn’t in the faucet at all. It’s in the supply line inside your wall, or at the threaded connection between the faucet and the pipe.
Common causes:
- A pipe that froze and split last winter and is only now showing under summer pressure.
- A loose threaded fitting that’s lost its seal.
- Corrosion at a galvanized-to-copper transition.
How to fix:
If you can see exposed plumbing inside a crawlspace or unfinished basement, trace the pipe back from the faucet and look for spray or moisture. A loose threaded fitting can sometimes be re-tightened, with fresh Teflon tape or pipe thread compound applied.
But if the leak is inside a finished wall — stop. Shut off water to the faucet, leave it off, and call a plumber. You’ll likely need to open drywall to access the damaged section. Continuing to use the faucet pressurizes the leak and accelerates structural damage.
Cause #5: Pitted Valve Seat
If you replaced the washer (Cause #1) and the spout is still dripping, the problem is one step deeper — the valve seat itself. The seat is the brass surface the washer presses against. Years of mineral buildup, debris, and compression can pit or scratch this surface, so even a brand-new washer can’t form a tight seal.
How to fix:
You have two options:
- Resurface it with a valve seat dresser/grinder tool — a cheap hand tool that screws into the faucet body and smooths the seat. Works on most standard hose bibs.
- Replace the seat if it’s a removable type. Use a valve seat wrench to unscrew it from inside the faucet body. Bring the old one to the store to match.
If neither option works and the faucet is more than 20 years old, replace the entire hose bib (Cause #7 covers full replacement).
Cause #6: Burst Pipe Inside a Frost-Free Faucet
If your faucet is the frost-free / frost-proof type (a long stem that extends 6-12 inches into a heated part of your house, with the actual valve seat located inside the warm zone), it’s designed to resist freezing.
But here’s where homeowners get caught: if you leave a hose attached over winter, water can’t drain back out of the long stem after you shut off the faucet. That trapped water freezes, expands, and splits the pipe inside the wall — usually invisibly. The split only shows itself in spring when you turn the faucet on and water sprays inside your wall or pools under the foundation.
How to fix:
You’ll need to replace the entire frost-free sillcock. This requires accessing the back of the faucet from inside (basement/crawlspace), unsoldering or unscrewing the supply connection, sliding the old unit out, and installing a new one of matching length. If you’ve never sweated copper, this is a plumber-level job. Cost: $200-400 with labor.
Cause #7: Damaged Hose Thread or Missing Washer
If water leaks only when a hose is connected, and stops when you disconnect the hose, the spigot itself is fine. The problem is at the hose connection. Common causes:
- The rubber washer inside the hose coupling is missing, flattened, or torn.
- The spigot threads are dented or stripped (often from over-tightening or impact).
- The hose coupling itself is bent or cracked.
How to fix:
Replace the rubber hose washer (10-pack for $2 at any hardware store). If the spigot threads are damaged, you can sometimes salvage them with a thread chaser, but more often you’ll need to replace the hose bib. If the hose coupling is the problem, a $5 brass replacement coupling installs in five minutes with a hose mender kit.
When to Replace the Whole Faucet
DIY repairs make sense for most leaks. But replace the entire hose bib if:
- It’s more than 25 years old and the body shows green corrosion or pitting.
- The valve seat is damaged beyond resurfacing.
- The threads where the hose attaches are stripped.
- You’ve replaced washers, O-rings, and seats and it still drips.
A standard hose bib costs $15-30. A frost-free sillcock runs $25-60. Installation by a plumber is typically $150-300 depending on access.
Frequently Asked Questions
Why is my outdoor faucet leaking from the top?
Water coming from the top of the faucet — usually from the vacuum breaker cap — means the anti-siphon valve has failed. Replace the vacuum breaker assembly. It typically unscrews from the top of the spigot and costs under $12.
Why does my outdoor faucet leak only when I turn it on?
A leak that appears only when the faucet is open usually comes from the stem packing or O-ring, not the washer. The seal that holds back water moving through the valve has failed. Replace the O-ring or packing.
Can a leaking outdoor faucet raise my water bill?
Yes a steady drip can waste 100-300 gallons per month. A small stream can waste over 1,000 gallons. If your summer water bill jumped without an obvious cause, check every outdoor faucet first, then check toilets and irrigation.
Should I shut off water to my outdoor faucet in summer?
No, not in summer. Outdoor faucets are designed for warm-weather use. Shut off the dedicated supply valve only in fall before freezing weather, then drain the line by opening the faucet outside.
How much does it cost to replace an outdoor faucet?
Parts cost $15-60 depending on whether it’s a standard hose bib or a frost-free sillcock. Professional installation runs $150-400 total, depending on access and whether soldering is required.
Why does my frost-free faucet leak only in spring?
A frost-free faucet that worked fine in fall but leaks when you first turn it on in spring almost always means the internal pipe split during a freeze — usually because a hose was left connected. The leak occurs inside the wall. Stop using it and replace the entire unit.
Is a leaking outdoor faucet covered by homeowners insurance?
Generally no — the faucet itself and gradual water waste aren’t covered. But if a sudden burst causes water damage to your home’s structure, that damage is often covered. Document everything and contact your insurer.